Water damage poses a serious threat to homes, leading to potentially costly repairs and health hazards. The Insurance Information Institute (III) reveals that from 2017 to 2021, nearly 23% of insurance claims were related to water damage and freezing. This statistic underscores the importance of taking preventative measures. By following a proactive maintenance strategy, you can safeguard your home from these issues. This guide offers essential tips and best practices to keep your property safe and dry, helping you avoid the severe consequences of water damage.
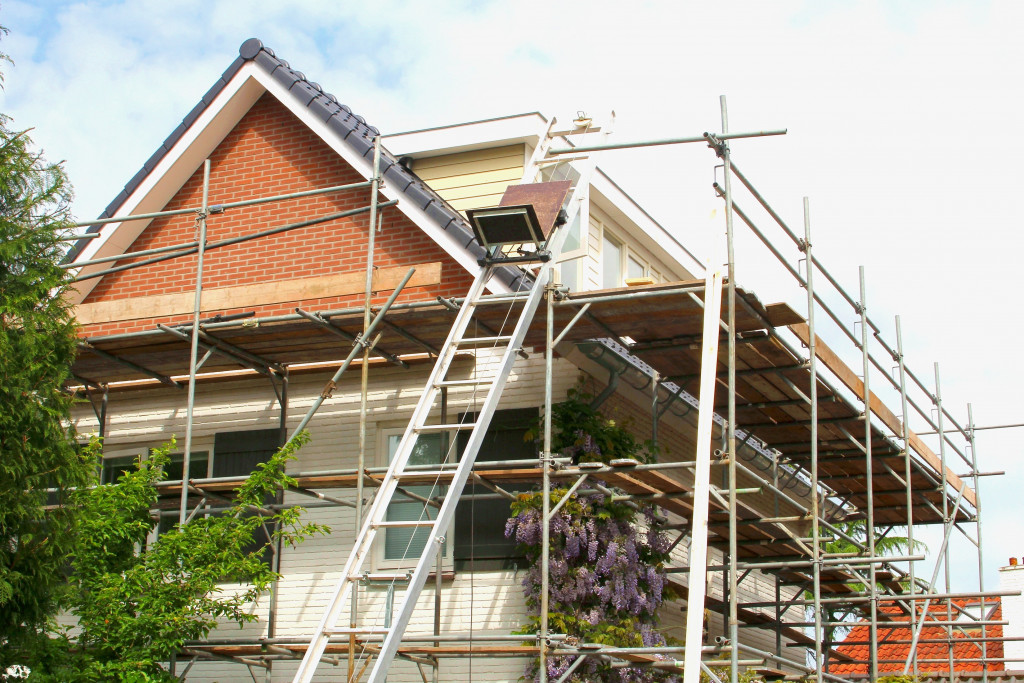
1. Regular Roof Inspections

Your roof serves as the primary barrier protecting your home from water intrusion and other environmental factors. Regular roof inspections are crucial since they help identify potential problems before they escalate. A well-maintained roof not only safeguards your home from leaks but also prevents structural damage that could compromise the safety and value of your property. To keep your roof in top condition, schedule inspections at least twice a year, ideally during spring and fall.
During a roof inspection, look for signs of wear and tear that could indicate underlying issues. Early detection allows for timely repairs, which can save you from more extensive and expensive repairs down the road. Here’s how to properly conduct a roof inspection:
Visual Inspection from the Ground:
Begin by inspecting your roof from the ground using binoculars. Look for any obvious issues, such as missing or damaged shingles, cracked flashing, and signs of wear around roof vents and chimneys. Pay close attention to the roof’s overall condition and any visible sagging or irregularities.
Inspect Roof Valleys and Joints:
Valleys and joints are common areas where leaks can develop. Check these areas for signs of damage or wear. Look for cracked or missing shingles, and ensure that the flashing is intact and properly sealed.
Examine Roof Penetrations:
Inspect areas where the roof intersects with other structures, such as chimneys, vents, and skylights. These points are vulnerable to leaks if the flashing or seals are compromised. Ensure that these areas are well-maintained and free of damage.
While you can perform basic roof inspections yourself, hiring a professional roofing company is advisable for a thorough assessment. Roofing experts have the experience and specialized tools to identify hidden issues that may not be visible during a DIY inspection. They can also provide expert recommendations for repairs or maintenance.
2. Clean Gutters and Downspouts

Proper gutter maintenance prevents water from accumulating around your home’s foundation, which can lead to costly damage. When gutters are blocked, rainwater cannot flow freely through the system and may overflow, potentially causing erosion, basement leaks, and even damage to your home’s exterior. Regularly cleaning your gutters and downspouts helps to ensure that water is effectively diverted away from your home.
Particularly in the fall, gutters are prone to clogging due to the accumulation of leaves and debris. Performing gutter maintenance during this season is crucial to prevent blockages that could lead to water damage. Follow these tips for cleaning your gutters and downspouts:
Safety First:
Always use a sturdy ladder and ensure it is positioned on a flat, stable surface. If you’re uncomfortable with heights or have a multi-story home, consider hiring a professional for gutter cleaning.
Remove Debris:
Start by removing debris from the gutters by hand or with a scoop. This may include leaves, twigs, and other materials that have collected in the gutter system. Be thorough in your removal to ensure that no debris is left behind.
Flush the Gutters:
After removing the bulk of the debris, flush the gutters with water using a garden hose. This will help clear out any remaining small particles and check for proper water flow. Ensure that the water flows freely through the downspouts and away from your home’s foundation.
Check Downspouts:
Inspect downspouts to ensure they are not clogged and that water is directed away from your home’s foundation. If necessary, use a plumber’s snake or a similar tool to clear any blockages.
Upgrade Your Gutters If Necessary:
For improved performance and reduced maintenance, consider upgrading to seamless gutters. Unlike traditional sectional gutters, seamless gutters are custom-made to fit your home without seams or joints, which significantly reduces the likelihood of clogs and leaks.
3. Check for Leaks Regularly

Leaks in pipes and fixtures can cause extensive water damage if not promptly addressed. Regular inspections and timely repairs are essential for maintaining the integrity of your home and preventing costly damage. Here’s a guide on how to effectively check for and manage leaks.
Start With Leak-Prone Areas:
Focus on common leak-prone areas such as under sinks, around toilets, and near appliances. These locations are more susceptible to leaks due to frequent use and potential wear and tear.
Visual Inspection:
Begin with a thorough visual inspection of visible areas. Check under sinks and around toilets for any signs of water stains or dampness. Look closely at the pipes and fixtures for any signs of corrosion or leakage. Mold or mildew growth can also be an indicator of hidden leaks.
Check for Drips and Dampness:
Feel around the base of sinks and toilets for any signs of dampness or drips. Inspect areas around washing machines, dishwashers, and water heaters for signs of leakage. Pay attention to changes in water pressure or unexpected puddles, as these can also signal a leak.
Monitor Water Bills:
Keep an eye on your water bills. A sudden increase in water usage can indicate a hidden leak. Compare current bills with previous ones to detect any unusual spikes in water consumption.
Tighten Fittings and Replace Washers:
Start by tightening any loose fittings on pipes and fixtures. If you notice worn or damaged washers, replace them promptly to prevent leaks. Small leaks can often be fixed with simple repairs such as tightening connections or replacing components.
Repair or Replace Damaged Pipes:
For more significant leaks, such as those caused by damaged pipes, you may need to make more extensive repairs. Use pipe repair clamps or sealants as temporary solutions, but consider replacing damaged sections of pipe for a more permanent fix.
If you encounter persistent leaks or are unable to locate the source of the problem, it’s wise to hire a professional plumber. Professional leak services can provide a thorough assessment and address complex issues that may not be visible during a DIY inspection. They have the expertise and tools necessary to handle extensive repairs and ensure that leaks are fixed effectively.
4. Maintain Your Sump Pump
A sump pump is a critical component in protecting your home from basement flooding, particularly in areas with high water tables or inadequate drainage. Regular maintenance is essential to ensure your sump pump functions correctly when needed. Here’s how to properly maintain your sump pump to prevent flooding and water damage.
Manual Testing:
To ensure your sump pump is working correctly, perform a manual test by pouring water into the sump pit. Use a garden hose or a bucket to add water until the pump activates. Observe whether the pump turns on, removes the water, and shuts off once the pit is empty. This test helps confirm that the pump’s float switch and motor are functioning properly.
Regular Testing Schedule:
It’s a good practice to test your sump pump at least once every three to four months. Additionally, perform a test before and during the rainy season to ensure the pump is in optimal condition when you need it most.
Clean the Pump and Components:
Remove any debris from the sump pit and clean the pump to prevent clogs. Turn off the power to the pump before cleaning. Use a brush or cloth to remove dirt and sediment from the pump’s surface and the interior of the pit. Regular cleaning helps maintain efficient operation and prevents potential blockages that could impair performance.
Inspect the Discharge Pipe:
Check the discharge pipe for obstructions or clogs. Make sure the pipe is clear and allows water to flow freely away from your home’s foundation. The discharge pipe should be directed away from your house to prevent water from flowing back towards the foundation or into the sump pit.
Evaluate Pump Age and Performance:
If your sump pump is old or showing signs of malfunctioning, consider replacing it with a newer, more reliable model. An aging pump may struggle to handle heavy water loads or fail when you need it most. Newer models often come with advanced features and higher efficiency.
Choose a Replacement Pump:
When selecting a new sump pump, choose one with the appropriate capacity for your needs. Consider factors such as the size of the sump pit, the volume of water it needs to handle, and the reliability of the brand. A professional plumber can help you choose the right pump and ensure proper installation.
5. Insulate Pipes
Insulating pipes is a crucial step in preventing water damage caused by frozen pipes, which can burst and lead to significant issues in your home. Proper insulation helps keep your pipes from freezing during cold weather, thereby avoiding costly repairs and water damage. Here’s a detailed guide on how to effectively insulate your pipes and protect them from freezing.
Pipe Insulation Sleeves:
Pipe insulation sleeves are foam or rubber tubes that fit around the pipes. They are easy to install and provide effective thermal insulation. Start by measuring the diameter of your pipes and selecting the appropriate size of insulation sleeves. Slide the sleeves over the pipes, ensuring they cover the entire length. Secure the sleeves in place with tape or clamps if needed.
Heat Tape:
Heat tape is another option for insulating pipes, especially in areas with extreme cold. It consists of an electrical heating element that wraps around the pipes and provides warmth to prevent freezing. Heat tape is ideal for especially cold climates and can be used in conjunction with insulation sleeves for added protection.
If using heat tape, wrap it around the pipes according to the manufacturer’s instructions. Be sure to cover the entire length of the pipe and avoid overlapping the tape. Plug the heat tape into an electrical outlet, and it will provide continuous warmth to keep the pipes from freezing.
Insulation Wraps:
Insulation wraps are flexible and can be wrapped around pipes to provide insulation. They are particularly useful for pipes with irregular shapes or locations that are difficult to access. For pipes located in unheated areas like basements and attics, ensure they are well-insulated with either sleeves or wraps. Pay special attention to any sections of the pipe that are particularly exposed to cold air.
If you’re unsure about the best way to insulate your pipes or if you encounter issues with frozen pipes, consider consulting a local plumber. A professional plumber can provide expert advice, perform necessary inspections, and offer solutions to ensure your pipes are properly protected.
6. Seal Basement Walls and Floors

Basement walls and floors are often susceptible to water intrusion, particularly in regions with high groundwater levels. Taking steps to seal these surfaces can prevent water from seeping into your basement, thereby avoiding potential damage. Follow these steps to seal basement walls and floors.
Clean and Prepare Surfaces:
Before applying any sealant, thoroughly clean your basement walls and floors. Remove dirt, dust, and any old paint or coatings. Use a wire brush or a power washer for stubborn residues. Ensure the surfaces are completely dry before proceeding, as moisture can affect the effectiveness of the sealant.
Apply Waterproofing Sealant:
Choose a high-quality waterproofing sealant suitable for basement applications. Apply the sealant to the interior walls and floors of your basement. Follow the manufacturer’s instructions for application, typically using a brush, roller, or sprayer. Be sure to cover all areas evenly and address any visible cracks or gaps.
Address Cracks and Gaps:
Inspect your basement walls for cracks or gaps where water might seep through. Use hydraulic cement or a similar sealant to fill these imperfections. For larger cracks, consider using a patching compound or a professional-grade epoxy. Properly sealing these gaps helps create a continuous barrier against moisture.
Install a Vapor Barrier:
In addition to sealants, consider installing a vapor barrier on the interior walls and floors. A vapor barrier is a plastic sheet or membrane that prevents moisture from passing through. It can be particularly useful in areas prone to high humidity or where sealant alone may not be sufficient.
If you encounter persistent water intrusion issues or are unsure about the best waterproofing solutions, consult water damage services. Professionals can provide expert assessments and recommend effective measures to protect your basement from water damage.
7. Clean and Maintain Your Water Heater
Maintaining your water heater is important to prevent leaks, extend its lifespan, and ensure it operates efficiently. Regular inspection and upkeep of water heaters can help avoid unexpected breakdowns and potential water damage. Here’s a comprehensive guide to cleaning and maintaining your water heater to keep it in top condition.
Check for Signs of Wear:
Inspect your water heater regularly for signs of rust, corrosion, or leaks. Rust or corrosion on the tank can indicate deterioration, which might lead to leaks. Look for water pooling around the base of the unit, which can signal a leak or malfunction. Early detection of these issues can prevent more serious problems and water damage.
Monitor Temperature Settings:
Ensure the temperature setting on your water heater is properly adjusted. The recommended temperature range is typically between 120 and 140 degrees Fahrenheit. Setting the temperature too high can increase the risk of overheating and damage, while setting it too low can result in insufficient hot water and potential bacterial growth.
Flush the Tank:
Sediment buildup in the tank may reduce the efficiency of your water heater and lead to overheating. Flush the tank periodically to remove sediment and mineral deposits, improving the heater’s performance and longevity. Aim to flush your tank at least once a year or according to the manufacturer’s recommendations.
Replace the Anode Rod:
The anode rod inside your water heater helps prevent tank corrosion by attracting corrosive elements into the water. Over time, the rod can become significantly worn and less effective, leading to potential corrosion of the tank. Regularly checking the anode rod is crucial for maintaining the health of your water heater.
While regular DIY maintenance is essential, scheduling a professional water heater service can provide a thorough inspection and address issues that might not be visible. A professional can perform more in-depth checks, such as inspecting the heating elements and ensuring all components are functioning correctly.
Final Thoughts
Preventing water damage requires a proactive approach and regular maintenance. By following these tips—inspecting your roof, cleaning gutters, checking for leaks, maintaining your sump pump, insulating pipes, sealing basement walls, and caring for your water heater—you can protect your home from water damage and ensure a safe and dry living environment. Stay vigilant and address any issues promptly to keep your home in top condition and safeguard your property from the perils of water damage.